The good news is I made S another one ..3? years ago and we still have that. My girls made me swear to never give that one away. I have promised to never give away another costume although I have loaned out a couple. But I implicitly trust the grandma I loaned it too so it's not a problem (Plus I know where she lives Mwahahahahah)
Anyway, the rule in our house is that Hallowe'en costumes have to be decided on by August because they're usually a bit elaborate and I DO NOT sew quickly! Nope, not at all. I'm hoping that might change with my sewing room out of the basement (C and I traded space...sort of - long story) but we shall see.
This year we have gone for a rather literary Hallowe'en (yes that's right, I plan on a costume for myself this year!).
C and I are going as a Hogwart's student (C) and a witch with style (which is what makes it Harry Potter-ish). I have a collection of witch hats and I usually wear one of those with an old cape that I have (made in high school....and that's a LONG time ago!) but I'm getting tired of something that simple and I wanted to step it up.
S is going to go as Annabeth from the Percy Jackson and the Olympians books. She's a fiend for them! The nice thing about her costume is that it's not very fancy and most of it will be purchased rather than made. Hopefully that will leave me enough time to up my witch look.
So for C it will be a Hogwart's robe (make) , a white dress shirt (already have), a sweater with Gryffindor colours (re-fashion), A skirt (make) and socks or tight with Mary Jane shoes (buy - she needs nice shoes anyway).
S's costume will be the fast and easy one this year; jeans (have), Jean jacket (bought at thrift store), orange t-shirt (bought ages ago) with Camp Half-Blood logo (will stencil that on), Yankees hat (bought in WA yesterday), a necklace with special beads (S is making that). Basically all I have to do it figure out the design and stencil on the camp logo. Sweeeeet!
For mine - well, I'm going to wait on that for a bit before I share it with you just in case I run out of time.
So first up and my plan for this week I've had off, if the Hogwarts robe. I started with Simplicity 5840. Now this isn't the perfect pattern but it's pretty darn close. The first change is to make the yoke into a front and back shoulder part. Pretty easy to do; cut along the shoulder line, add seam allowances to the shoulder and take away the seam allowances where it joins the body. I didn't take any pictures of that but if anyone asks me; I can recreate it.
Then it was on to take out some length. Now I don't know who they intended this pattern for but C is over 5'4" and after taking out 9.5 inches.....it's only just up to her ankle bone! If I had left that 9.5 inches in....well, I'm sure you can all do the math. LOL
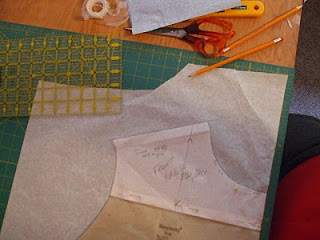
Here's how the pattern looked when I evenly took out the inches.
See, the trick to taking out that much length is to make lots of small adjustments. If you just took it off the bottom the robe would be shorter but it wouldn't be as wide on the bottom either. And you usually don't want that.
Of course once you've done that you can see that you get a really rough edge. To fix that you draw a line from the top edge just before the changes to the bottom edge.
Then you fold over on the line and tape it. Voila! A smooth cutting/sewing edge.
After this adjustment was done next came some pattern creation. C wanted her robe to look like the ones first seen in Prisoner of Azkaban. that means with the hood and sleeves lined with colour and with a coloured facing. In her case with a red/burgundy to match Gryffindor. The hood and sleeves are easy but the facing pattern had to be drafted by me.
To start, take the front and trace off the edges - front, shoulder, armhole (more for reference) and neck, and mark the bottom as well.
Then measure out from those lines how wide you want the facing to be. I chose 6" so it would be nice and wide. Join all your marks and make a smooth line.
Since 6" ended up coming out very close to the armhole line I decided to extend the facing out that far.
Make sure your lines are nice and smooth for easy sewing and voila! you have a whole new pattern piece you didn't have before.

After all that (it actually only took about 10 minutes) came cutting out and let me tell you this pattern is a bear to cut. For one thing it has a huge bottom edge so you have to fold your fabric in half width-wise instead of length wise. That means that the fabric is now wider than my cutting table. Ack!
But it got done, regular sewing then ensued and as of today....an almost completed Hogwarts robe! One big heavy WARM Hogwarts robe; it's interlined with flannel; October is not usually all that warm around here.
Today I have to finish up the tacking down of the facing and sewing on the Gryfinndor patch.
Tomorrow....hopefully pictures!
Ta!


No comments:
Post a Comment